目次
3Dモデルを作成
最低限やること
- 位置、大きさなどを確定させる
- UVマッピング
- Material設定
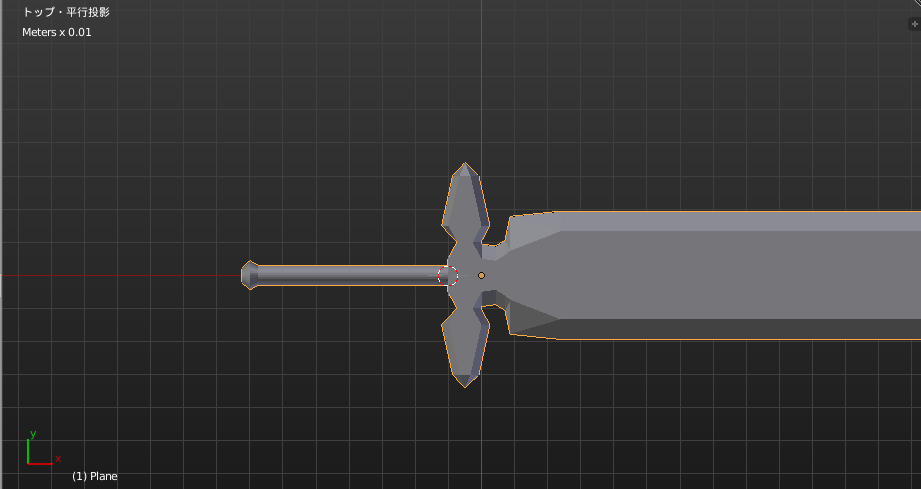
位置、大きさなどを確定させる
これをやらないと位置やサイズなどが確定されずエクスポート失敗の原因になる。
Ctrl+A 位置、拡縮、回転または、全てを適用。
UVマッピング
3Dビューで、Uキーを押す。
UVマッピング
展開
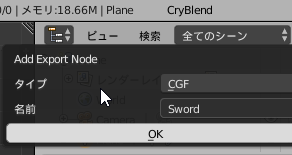
Add Export Node
「Add Export Node」から「タイプ」「名前」を設定する。
設定するとBlenderの「グループ」に「名前.cgf」のグループが作られる。
このグループがエクスポートするモデル名。
![2016-03-24 09_04_50-Blender_ [F__Users_Blender_00sao_k_5.blend]](https://memonotealpha.net/wp-content/uploads/2016/03/2016-03-24-09_04_50-Blender_-F__Users_Blender_00sao_k_5.blend_.png)
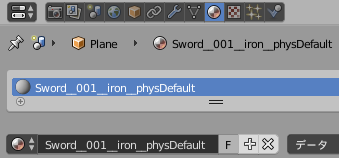
Material設定
Material設定
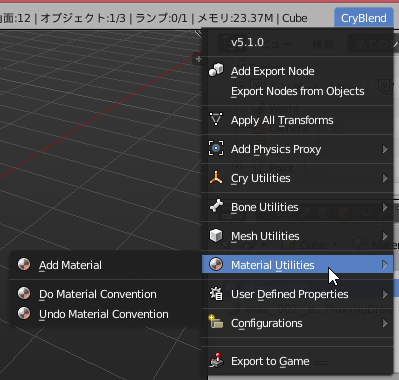
- Add Material
- Do Material Convention
- Undo Material Convention
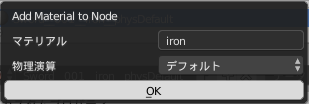
「Add Material」からMaterial名、phy属性の設定。
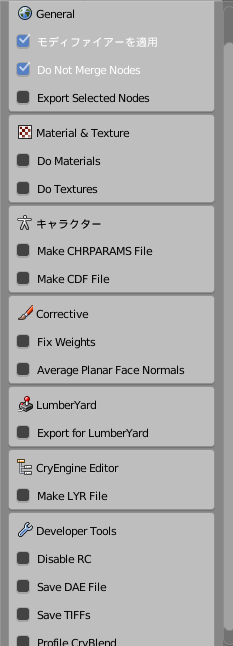
「Export to Game」からエクスポート
追加で作成するファイルなど設定する。
「Do materials」で.malファイルを作成
「Save DAE File」で.daeファイルを作成
エクスポートが成功しているかを確認するためにBlenderのシステムコンソールから確認する。
ウインドウ > システムコンソール切替
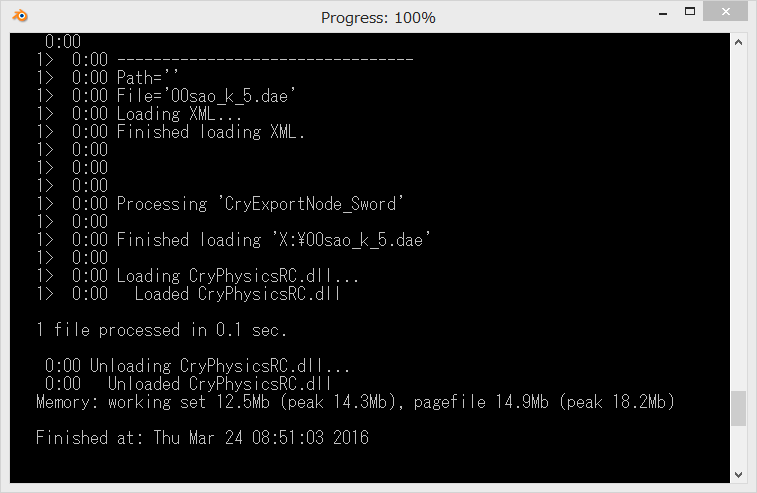
成功していれば「Finished」が表示されている。
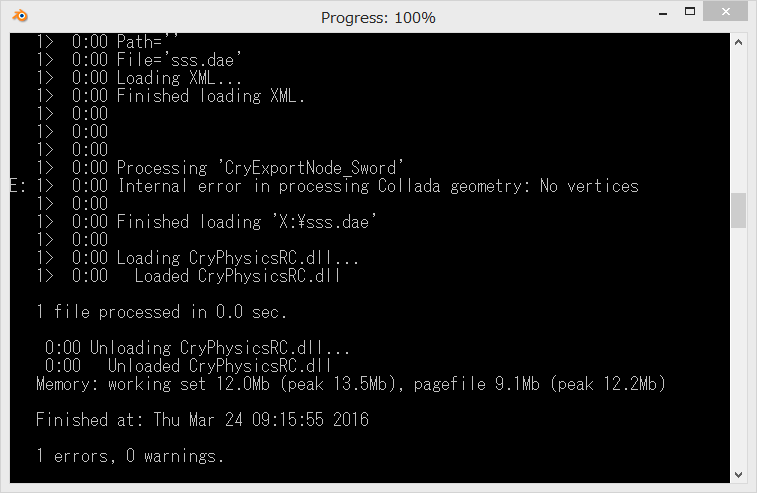
エラーの場合。エラー理由が表示されるので修正する。
読めない場合、左上のアイコンを右クリック 編集 > 範囲指定 で文字をコピー出来る。
書きかけ
Changelog
https://github.com/travnick/CryBlend/blob/master/CHANGELOG.md
CryBlendのTutorialsなど
https://github.com/travnick/CryBlend/wiki
| ボタン名 | ボタン名JP | 説明 | 説明JP |
| Find The Resource Compiler | リソースコンパイラの場所を設定 | Select the Resource Compiler executable. | |
| Find the Resource Compiler for Texture Conversion | Select if you are using RC from cryengine newer than 3.4.5. Provide RC path from cryengine 3.4.5 to be able to export your textures as dds files.’ | ||
| Select Textures Directory | Texturesディレクトリを選択 | ||
| operator: Saves current CryBlend configuration. | 現在のCryBlendの設定を保存 | Save Config File | |
| Add Export Node | エクスポートノードの追加 | Add selected objects to an existing or new CryExportNode | 新規または既存のCryExportノード(blenderのグループ)に選択したオブジェクトを追加。 |
| Nodes from Object Names | オブジェクト名からノード | ||
| Apply Transforms | Click to apply transforms on selected objects | 選択したオブジェクトに変換を適用 | |
| Add Proxy | Proxyを追加 | Click to add proxy to selected mesh. The proxy will always display as a box but will be converted to the selected shape in CryEngine. | |
| Add Joint | Jointを追加 | Click to add a pre-broken breakable joint to current selection. | |
| Add Branch | Branchを追加 | Click to add a branch at active vertex or first vertex in a set of vertices. | |
| Add Branch Joint | Click to add a branch joint at selected vertex or first vertex in a set of vertices. | ||
| Update material names in CryExportNodes | Materials will be named after the first CryExportNode the Object is in. Set Material Names by heeding the RC naming scheme: | ||
| Remove CryBlend properties from material names | Material名からCryBlendのプロパティを削除 | Removes all CryBlend properties from material names. This includes physics, so they get lost | |
| Add Material to Node | Add material to node | ||
| Edit Inverse Kinematics of Selected Bone | 選択したBoneのIK編集 | Edit inverse kinematics properties for selected bone. | |
| Edit physic proxy properties of active object. | Edit Physic Proxy Properties for selected object. | ||
| Edit render mesh properties of active object. | Edit Render Mesh Properties for selected object. | ||
| Edit joint node properties of active object | Edit Joint Node Properties for selected joint. | ||
| Edit deformable properties of active skeleton mesh. | Edit Deformable Properties for selected skeleton mesh. | ||
| __physDefault | Fix Wheel Transforms | ||
| __physProxyNoDraw | __physProxyNoDraw will be added to the material name. | ||
| __physNone | __physNone will be added to the material name | ||
| __physObstruct | __physObstruct will be added to the material name. | ||
| __physNoCollide | __physNoCollide will be added to the material name. | ||
| Find Degenerate Faces | Degenerate Facesを探します | Select the object to test in object mode with nothing selected in \it’s mesh before running this. | |
| Find Lines with 3+ Faces. | Select the object to test in object mode with nothing selected in it’s mesh before running this. | ||
| Find Weightless Vertices | Select the object in object mode with nothing in its mesh selected before running this | ||
| Remove All Weight from Selected Vertices | Select vertices from which to remove weight in edit mode. | ||
| Find All Objects with No UV’s | UVの無いすべてのオブジェクトを検索 | Use this with no objects selected in object mode to find all items without UVs. | |
| Add UV’s to Objects | オブジェクトへUVの追加 | Add UVs to all meshes without UVs. | |
| Add Root Bone | ルートボーンを追加 | Click to add a root bone to the active armature. | |
| Add BoneGeometry | BoneGeometryを追加 | Add BoneGeometry for bones in selected armatures. | |
| Remove BoneGeometry | BoneGeometryを削除 | Remove all bone geometry from the scene. | |
| Rename Phys Bones | _Phys Boneの名前を変更 | Renames bones with _Phys extension. | |
| Apply Animation Scaling | Select to apply animation skeleton scaling and rotation | ||
| Remove All FakeBones | すべてFakeBonesを削除 | (Deprecated) Remove all fakebones for backward compatibility | |
| Export to Game | Select to export to game. |
| Error | |
| Export Utilities | |
| Cry Utilities | |
| Bone Utilities | |
| Mesh Utilities | |
| Material Utilities | |
| Custom Properties | |
| Configurations | |
| Export | |
| CryBlend | |
| Add Physics Proxy | |
| Cry Utilities | |
| Bone Utilities | |
| Mesh Utilities | |
| Material Utilities | |
| User Defined Properties | |
| Configurations | |
| Add Material Physics | |
| CryBlend |

ピンバック: CryENGINE 3にBlenderの3Dモデルをインポートする 準備 | めものーとあるふぁ